
It all starts with a single image. One glance, one spark of inspiration. Now imagine turning that image into a story, into an entire world without ever breaking your creative flow.
What if the image you love, the one that was almost perfect, could evolve with you? With just one image character reference, you get consistency across every scene. Then you layer your world, extend it, remix it. You can even fill in the blanks, restyle it, and add text—all right inside the canvas.

This isn’t just image generation anymore. It’s storytelling on your terms. It’s an AI sketchbook you can take with you anywhere.
In this tutorial, I’m going to show you exactly how far you can take your favorite image using Ideogram AI.
Character Reference – Creating Perfect Consistent Characters
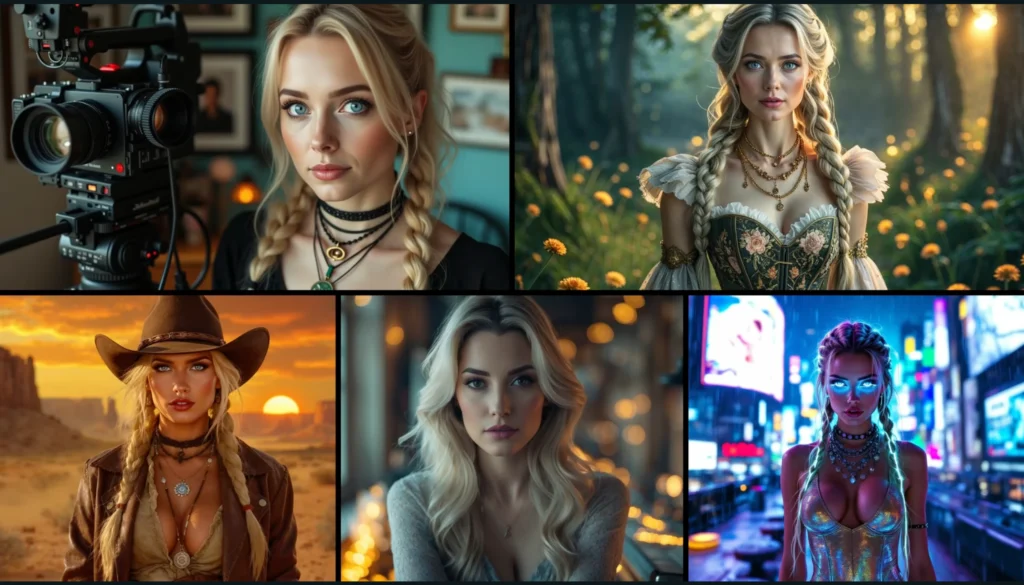
The newest addition to Ideogram AI is character reference. With this feature, you can use one image to produce consistent characters from scene to scene.

Here’s how to do it step by step:
- Go to the Ideogram homepage.
- On the toolbar, select the Character button.
- You’ll now see all the characters you’ve created.
- If you have many, click See More to expand.
- If you’re starting fresh, you’ll need to create a character.
Ways to Create Your Character
- Use your webcam → Take a picture of yourself or someone with you.
- Upload an image → Choose from:
- AI-generated image.
- A picture from your phone.
- A file on your computer.
- Select from previous Ideogram creations.
For example, I chose a character with:
- Red lips.
- Green eyes.
- Curly hair with brown-black undertone.
- A red garment.
- Double row gold necklace.
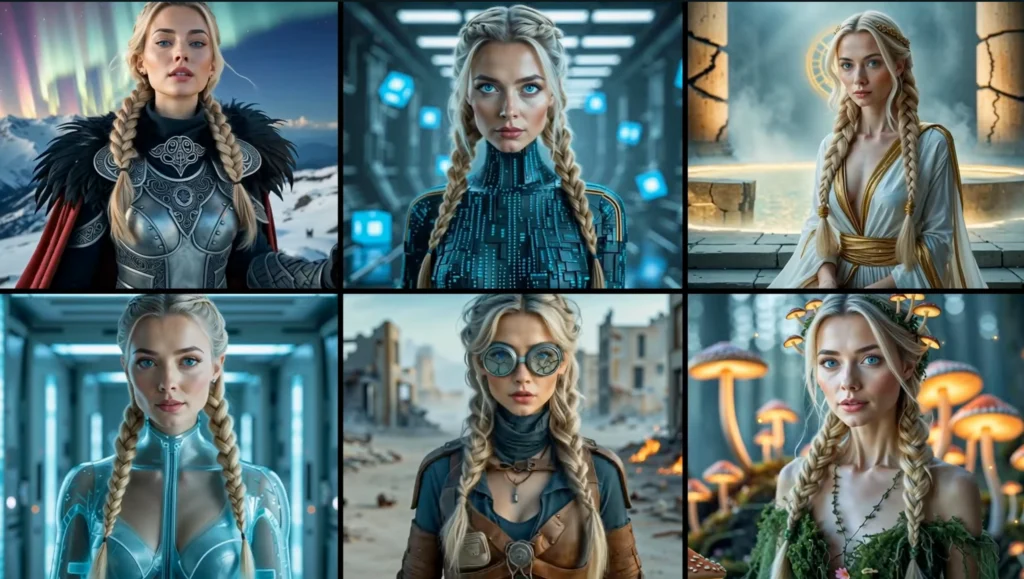
These distinctive features make it easy to transfer details consistently.
Uploading and Processing the Character
Even if you created the original image in another AI tool like Leonardo, you can drag and drop it into Ideogram. The system will automatically detect the face.
At first, you don’t need to edit the mask. Let it process and see what happens.
Using Templates & Face Swap
If you’re new to Ideogram, templates are a great way to practice.
- Open Templates.
- You’ll see two main options:
- Scene templates.
- Face swap templates.
- Choose one. For example, a meme image.
- The system will create a magic fill to replace the highlighted pink area with your character.
At this point, you may notice the face matches well—green eyes, red lips, curly hair—but the outfit may not transfer. That’s when editing the mask becomes important.

Editing the Mask for Accuracy
- Go back to your character reference.
- Select the red areas that represent parts of your character you want to preserve.
- Include arms, clothes, jewelry, and hair.
- Adjust stroke size for precision.
- Save your edits.
Now, when you use magic fill again:
- The full character appears with the correct outfit, jewelry, and hairstyle.
- Details like the necklace and earrings remain accurate.
This step is essential if you want consistent outfits or costumes across scenes.
Organizing Characters
You can name characters for easy access:
- Click the three dots by the character.
- Assign a name (example: “Lucy”).
- All images created for Lucy will be stored under her profile.
This is helpful when you’re working with multiple characters.
Non-Human Characters
Character consistency works for non-humans too.
For example, I tested a tie-dye bear:
- Pink belly, yellow patches, and blue areas all stayed consistent.
- Every generated image matched the original features.
This makes Ideogram useful for creating mascots, animals, or fantasy creatures that need to remain recognizable.
Adding Consistent Creature Features
Sometimes you need to include features beyond the face.
Example: a fairy character named Tess.
- By default, the system only detects her face.
- But Tess also needs her wings.
Steps:
- Unmask the wings manually.
- Choose a background scene with another character.
- Mask that character so Tess can replace them.
- Add a prompt like: “Photorealistic image of Tess the fairy sitting in her office with computers in the background.”
At first, the wings might not appear. To fix this:
- Add “with shimmering wings” to the prompt.
- Highlight more area where the wings should be.
With persistence, the wings will generate correctly.
Note: If a character has no visible face (like an astronaut with a helmet visor down), Ideogram cannot create a consistent face.
The Canvas – Full Scene Control
One of the most impressive features is the Canvas.
Here’s how it works:
- Start a new canvas.
- Drag your character (e.g., astronaut) into the canvas.
- Remove or edit the background.
- Save the character alone.
Now you can add scenery around the character.
Example: Place the astronaut on Mars.
- Prompt: “Photorealistic Mars surface with a large crater in the distance, no characters.”
- Generate the scene.
- Drag and place your astronaut anywhere in it.
- Use Arrange → Send to Back to adjust layers.
You can duplicate, resize, and reposition the character across multiple backgrounds.
This makes the canvas ideal for storyboarding projects.
Extending and Expanding Scenes
If your image isn’t the right size or aspect ratio, you can extend it.
Example:
- You have a vertical 9:16 image.
- You need a horizontal 16:9 for video.
Steps:
- Select the image.
- Click Extend.
- Choose 16:9 aspect ratio.
- Write a simple prompt, e.g., “Woman working in a high-tech office.”
- The system expands the background seamlessly.
This is useful for:
- Thumbnails.
- Banners.
- Video content.
You can also change the setting while keeping the same character—for instance, moving her from a futuristic office to a retro 1950s office with a typewriter and filing cabinets.
Adding Text in Canvas
One of the strengths of Ideogram is accurate text generation.
To add text directly to an image:
- Select Text in the canvas.
- Type what you want.
- Customize:
- Alignment (center, left, right).
- Font style (regular, bold, semi-bold).
- Color (choose with the color picker or eyedropper).
Example: Pick a hair color from the character and apply it to the text for a natural design match.
This removes the need to export images to tools like Canva for text overlays.
Fixing Incomplete Images
Sometimes AI cuts off parts of a character, like the top of the head. You can fix this using Extend:
- Place the image in the center of a 16:9 canvas.
- Add a simple prompt (e.g., “Magical forest around her”).
- Extend the scene.
The missing head or background will be restored, while keeping the character intact.
You can also resize for different formats (widescreen, story, short video).
Consistency Results
By using character reference and canvas tools together, you can:
- Keep outfits the same across scenes.
- Change outfits while maintaining facial identity.
- Generate multiple scenarios with the same character.
- Expand images to fit any format.
- Add accurate text without external tools.
Final Thoughts
Ideogram AI makes it simple to:
- Build characters.
- Keep them consistent across multiple images.
- Place them in new environments.
- Add text and fix errors directly in canvas.
The ability to handle both human and non-human characters, extend incomplete images, and storyboard within the platform makes it a powerful creative tool.
I’ve been experimenting with these tools daily since 2022 for both work and personal projects, and this workflow has helped me keep my characters consistent while saving time.