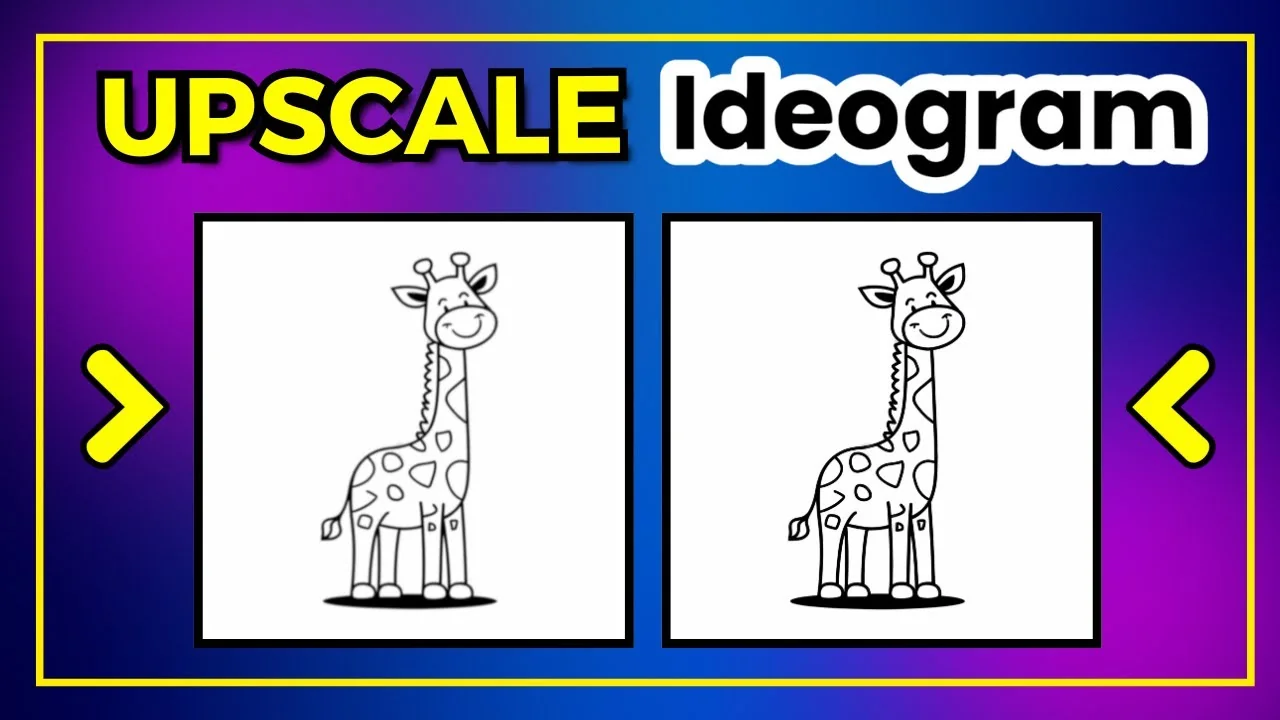
You can now upscale directly in Ideogram. At the moment it’s only possible to upscale an image by a factor of 2x. Other upscaling options may be added in the future. I’m hoping more options get added soon.
Ideogram AI Image Upscaling: How to Start
There are a couple of different ways to upscale images.
Method 1: From a single image
This will only upscale the image you see.
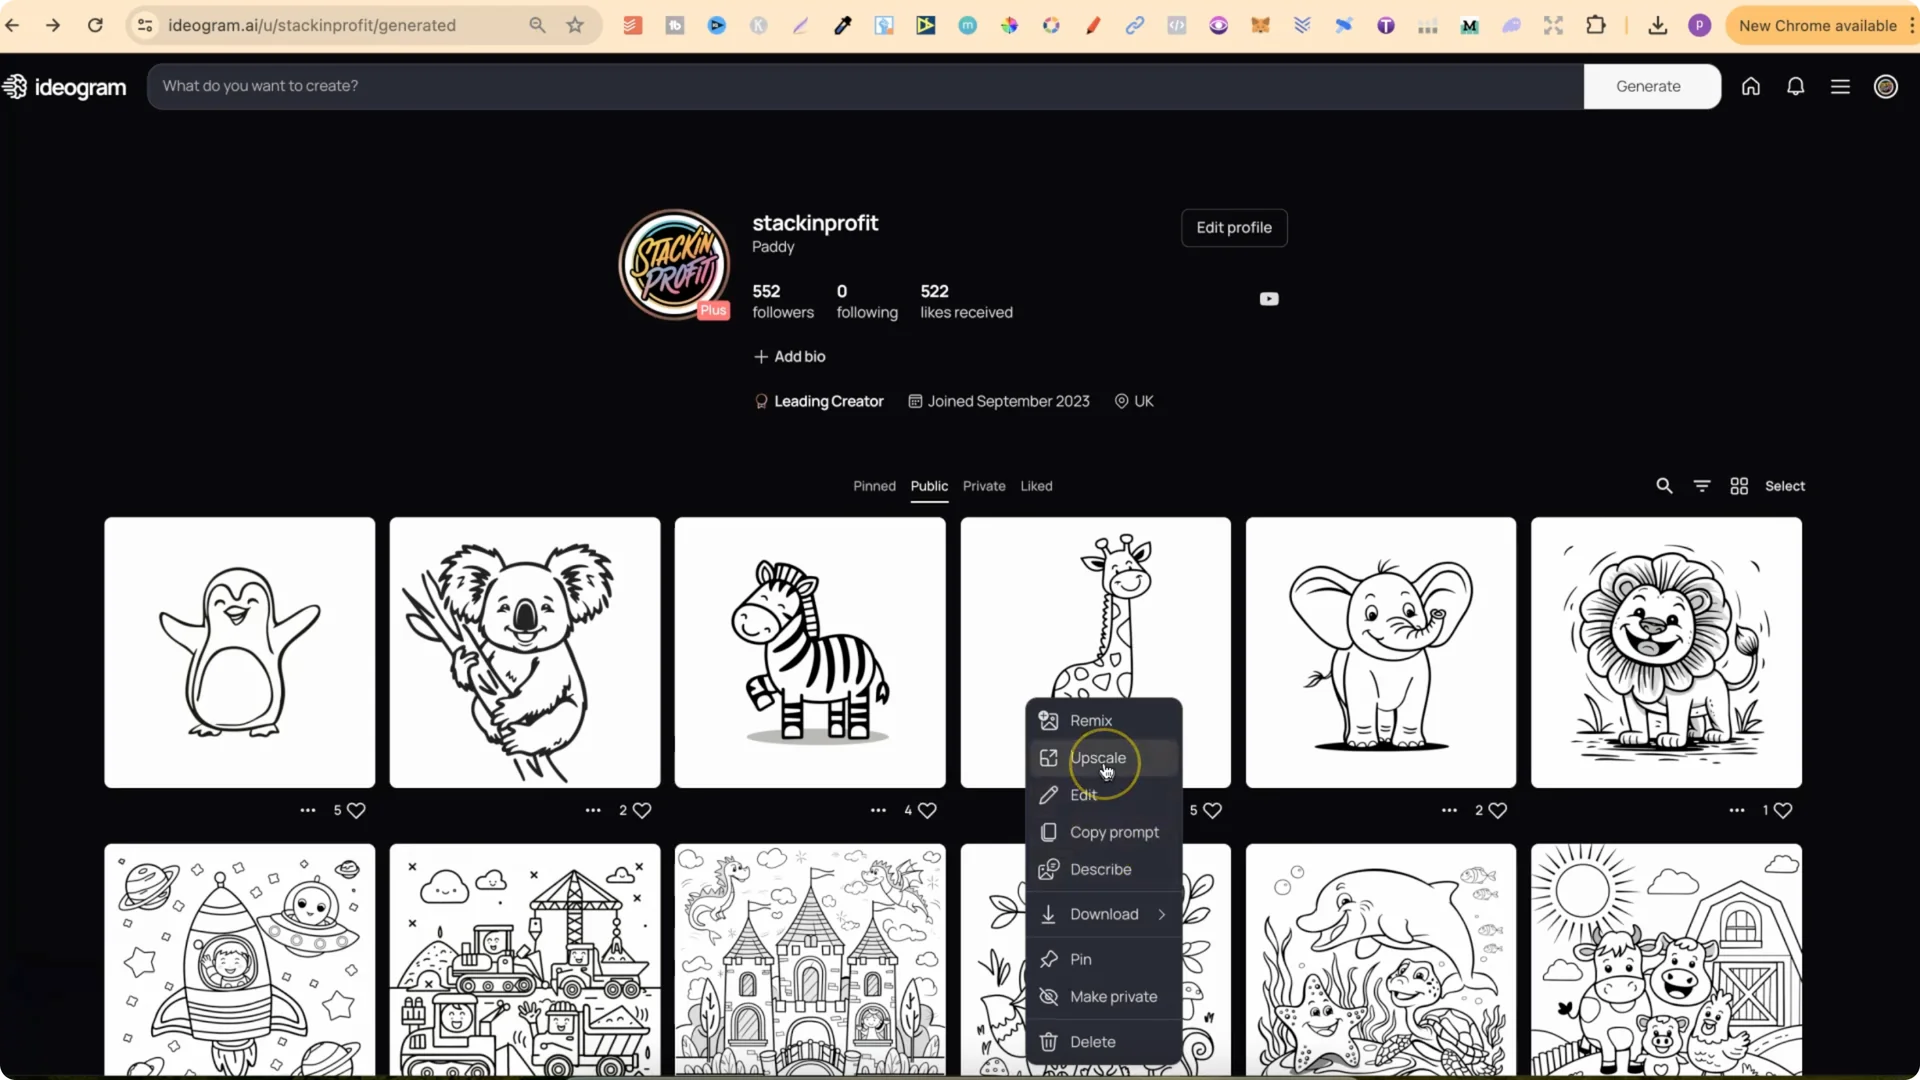
Method 2: From the grid of four
Ideogram generates four images with each prompt. To pick a specific one:
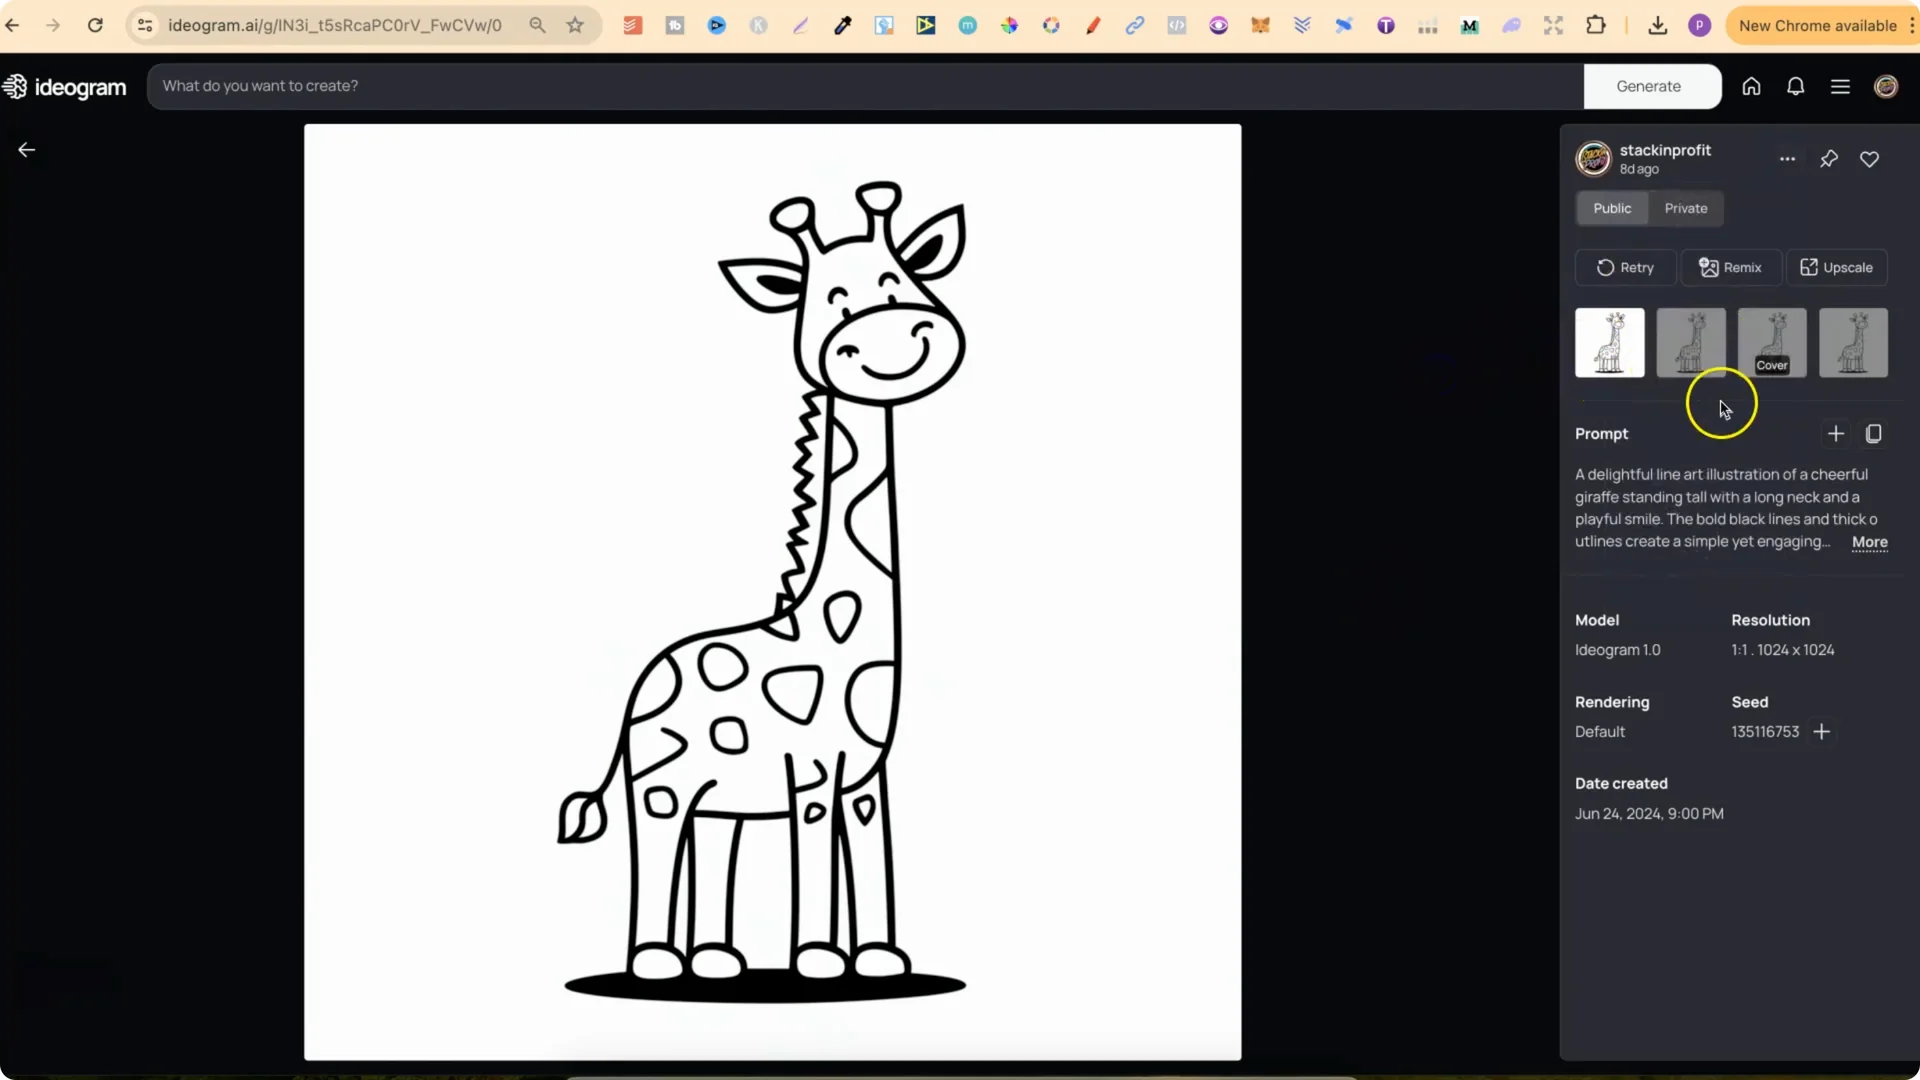
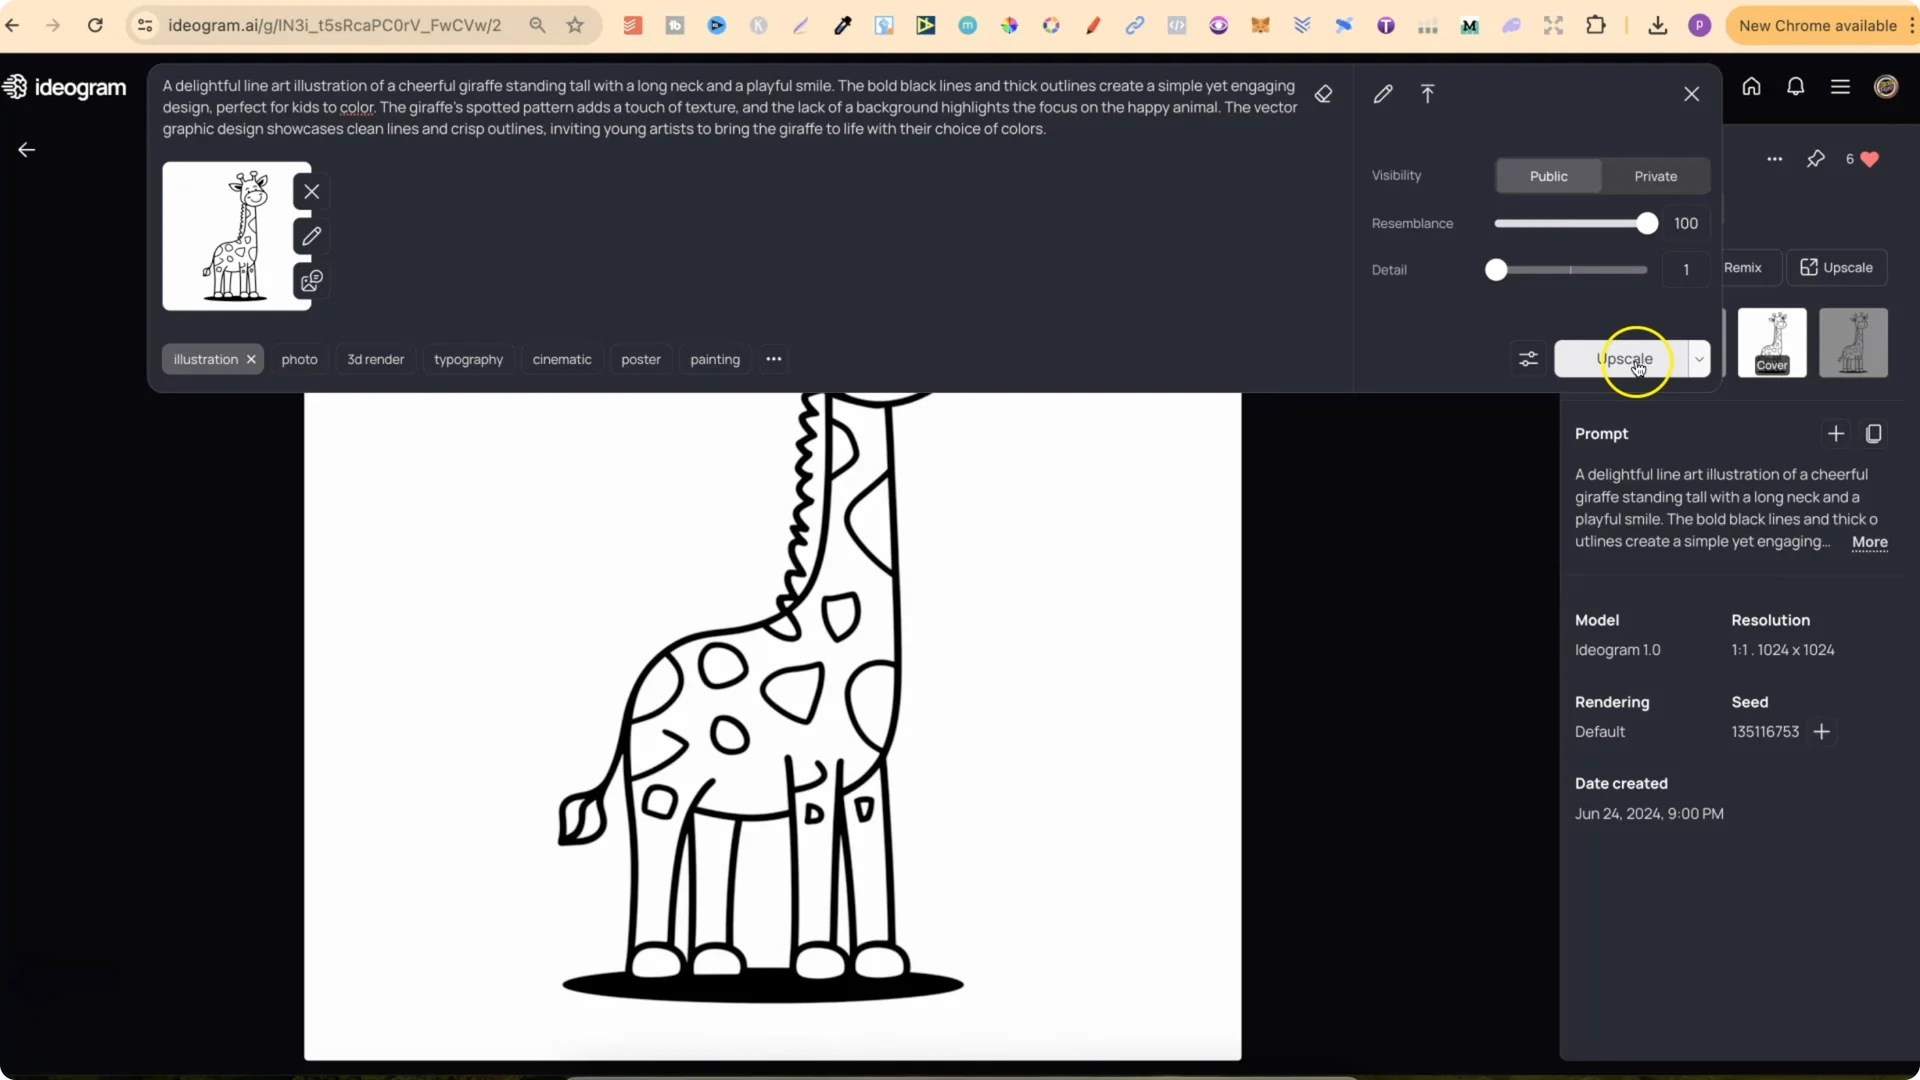
When you click Upscale, Ideogram adds the prompt that created the image to the prompt box and also attaches the image you want to upscale. You can set visibility if you want. I put mine on Public.
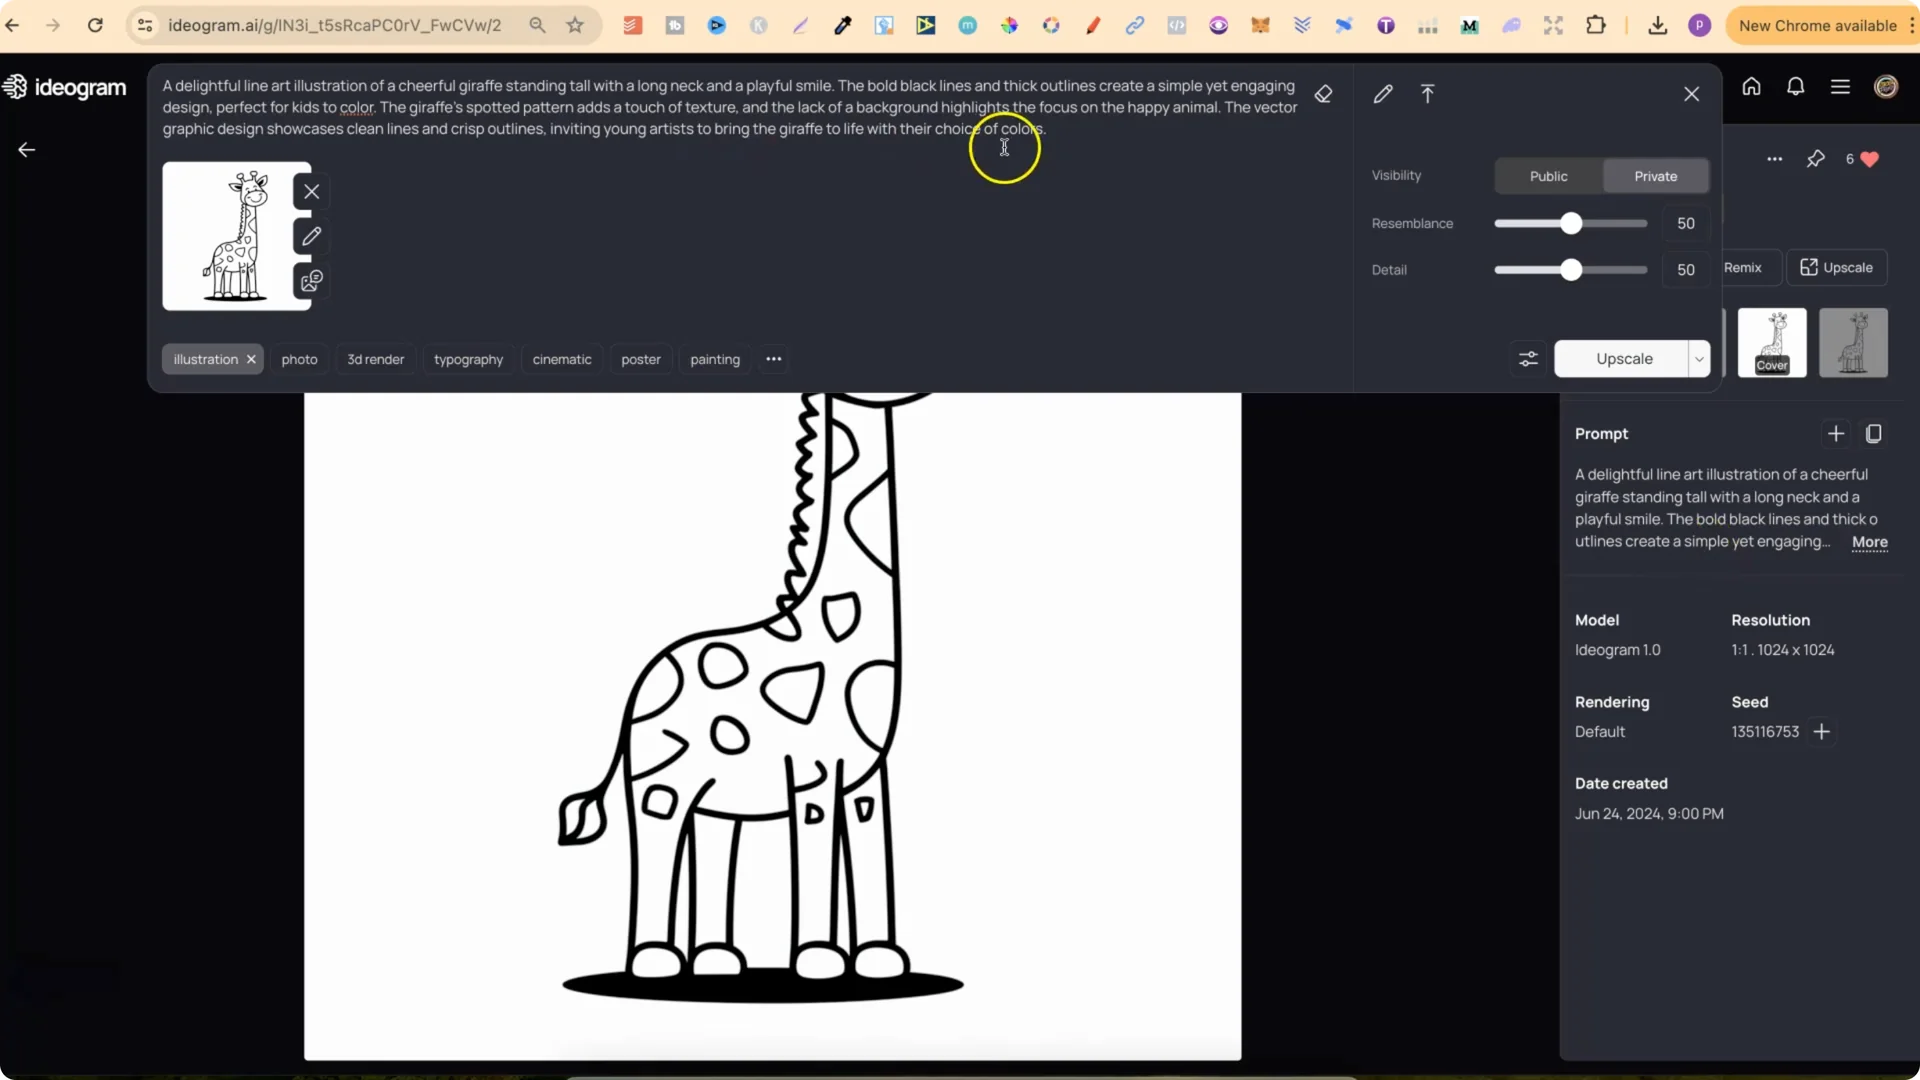
Ideogram AI Image Upscaling Settings: Resemblance and Detail
You get two important controls: Resemblance and Detail.
Resemblance
This is the parameter that tells the AI how identical you want the enlarged image to be to the original. A value of 1 will give the AI more latitude to be creative with the image. This is sometimes useful for correcting certain defects or enhancing certain details. With a value of 100, the result will be as close as possible to the original image.
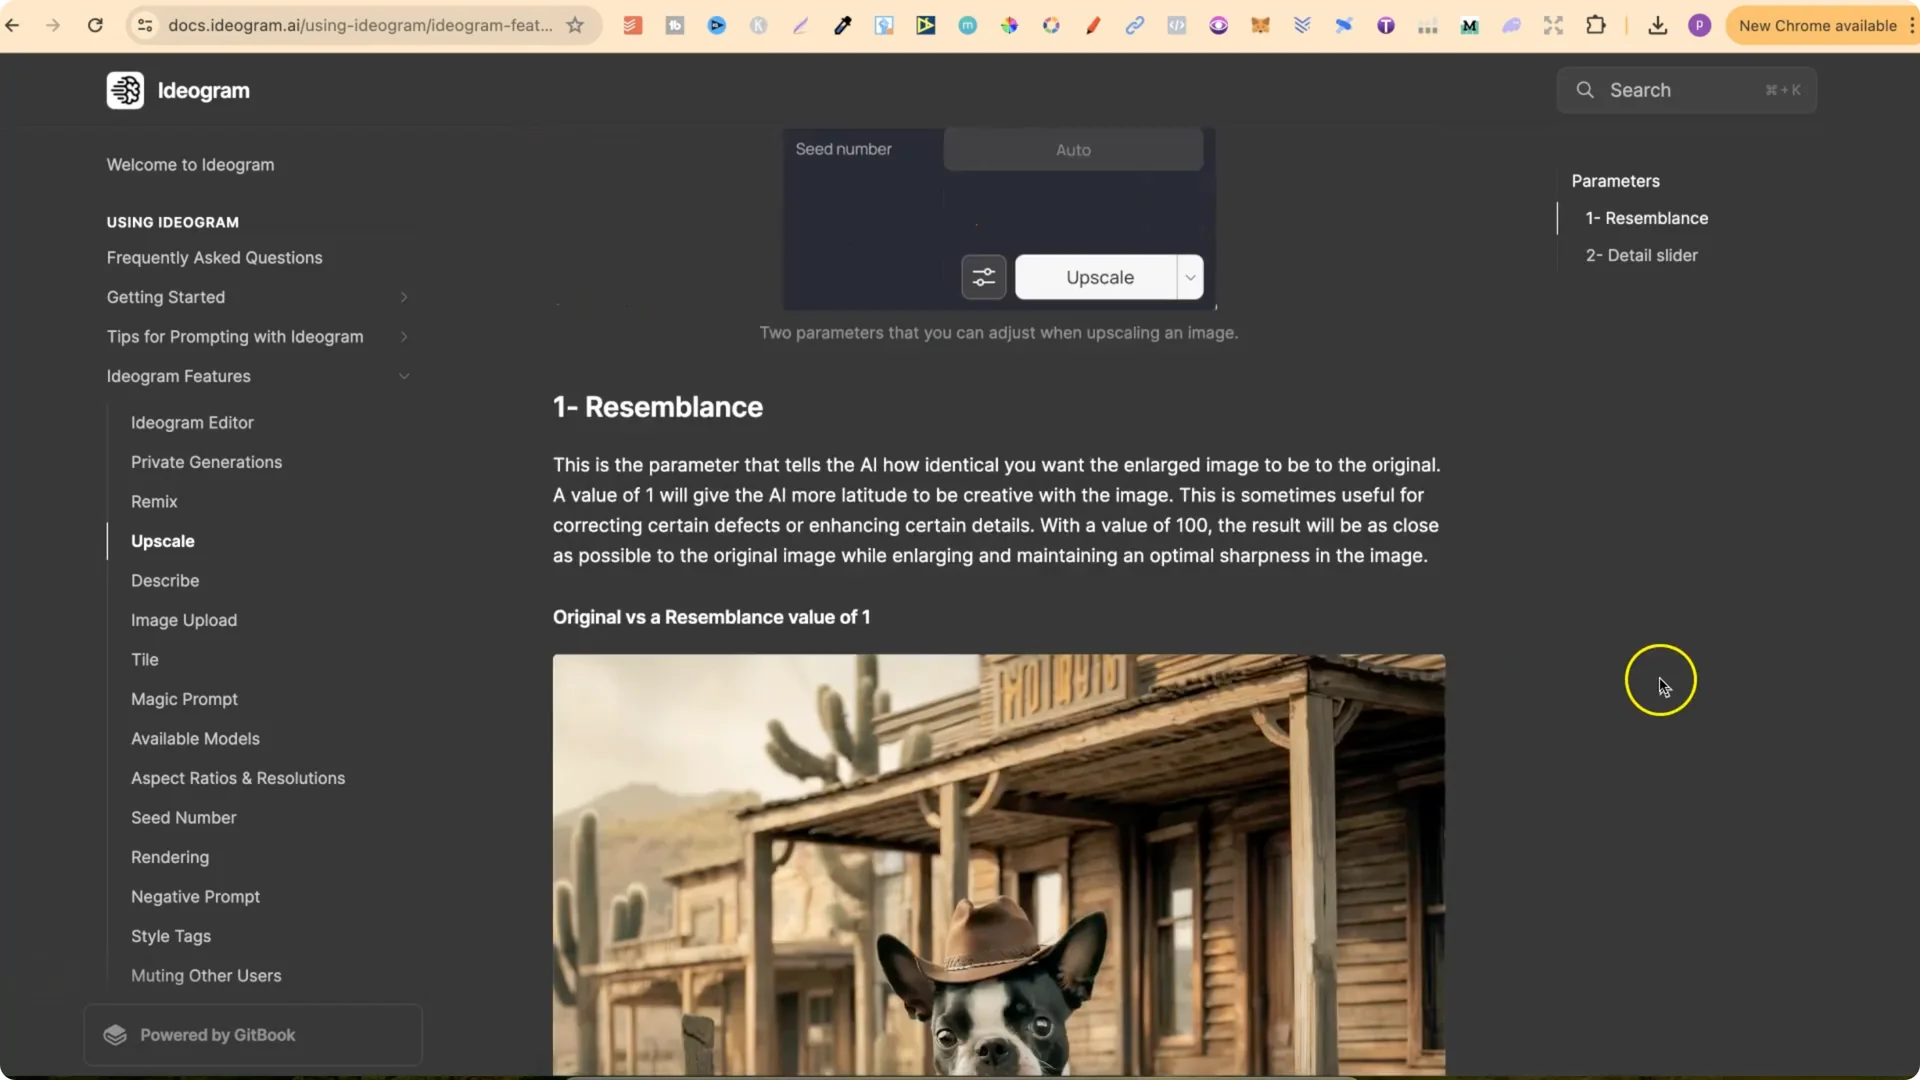
If I want the upscale to be pretty identical, I set Resemblance to 100.
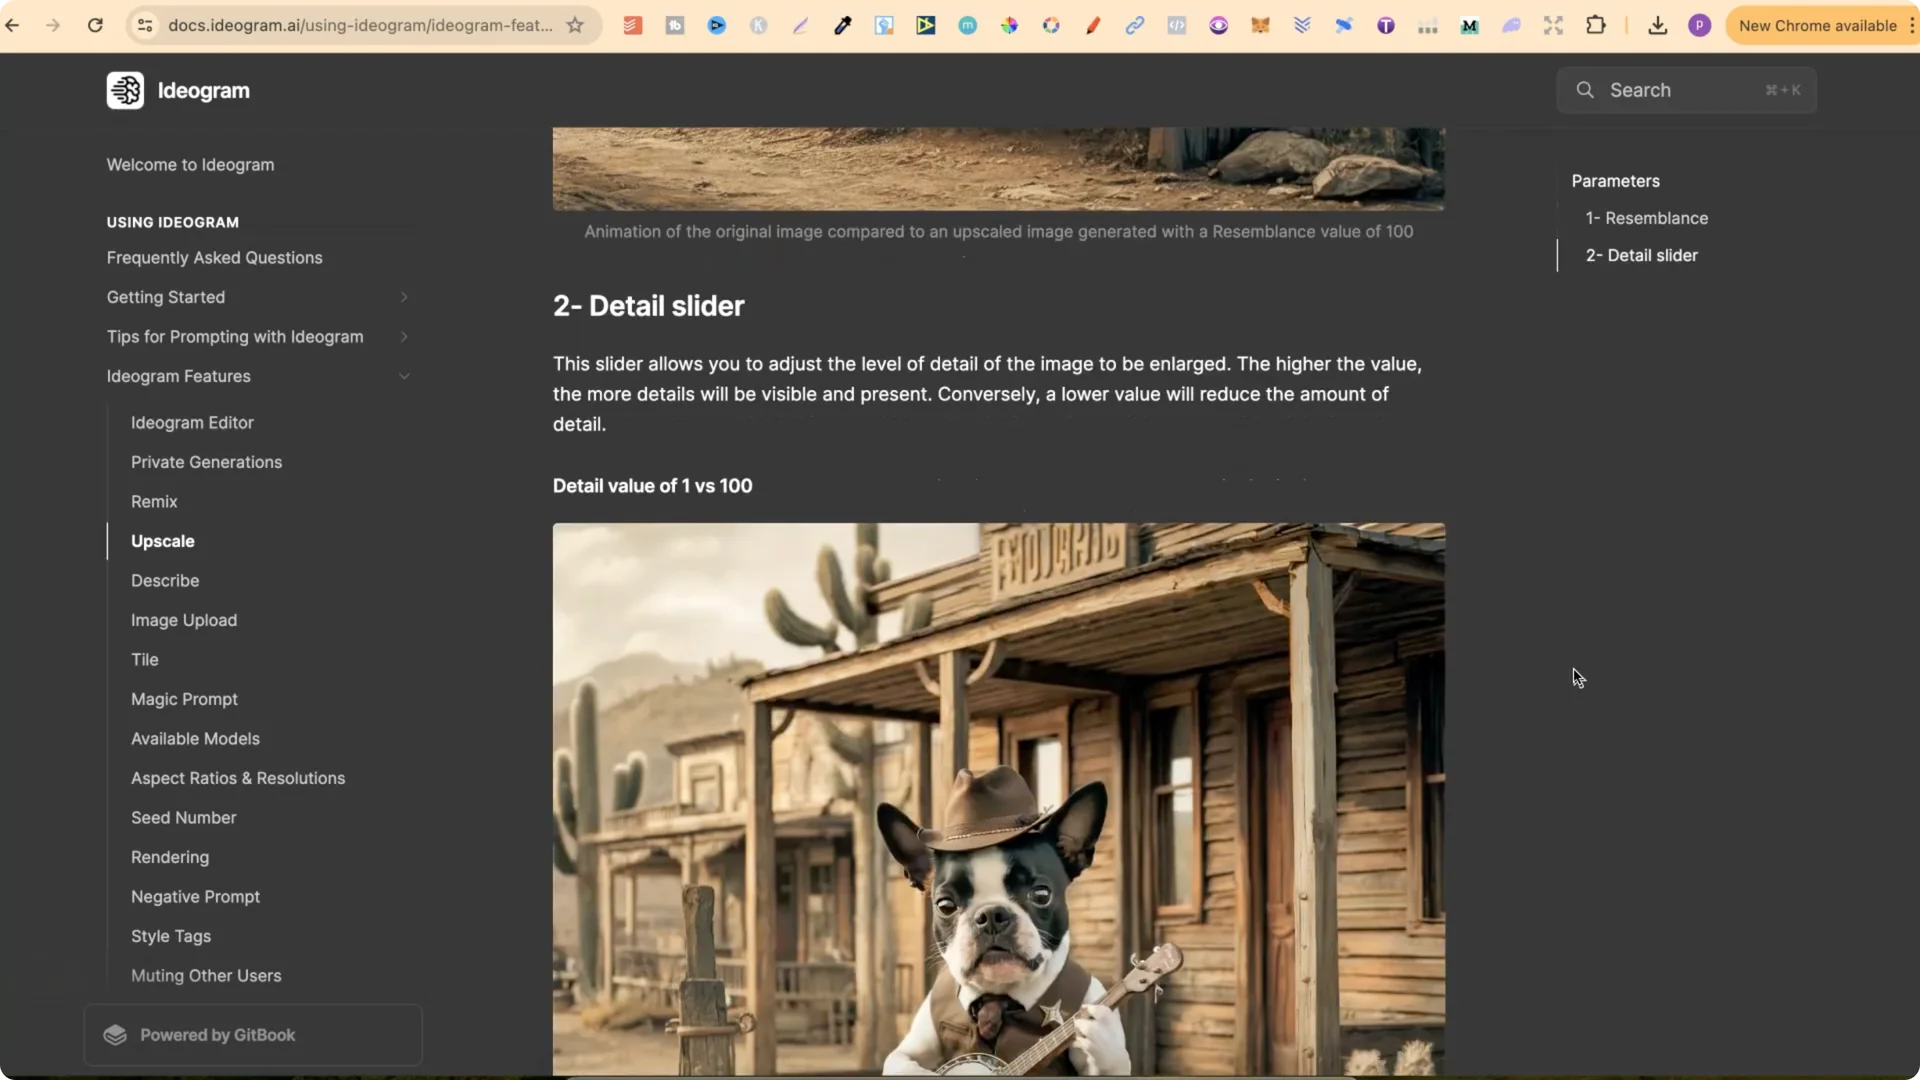
Detail
This slider allows you to adjust the level of detail of the image to be enlarged. The higher the value, the more details will be visible and present. Conversely, a lower value will reduce the amount of detail.
Ideogram AI Image Upscaling: Run the Upscale and Download
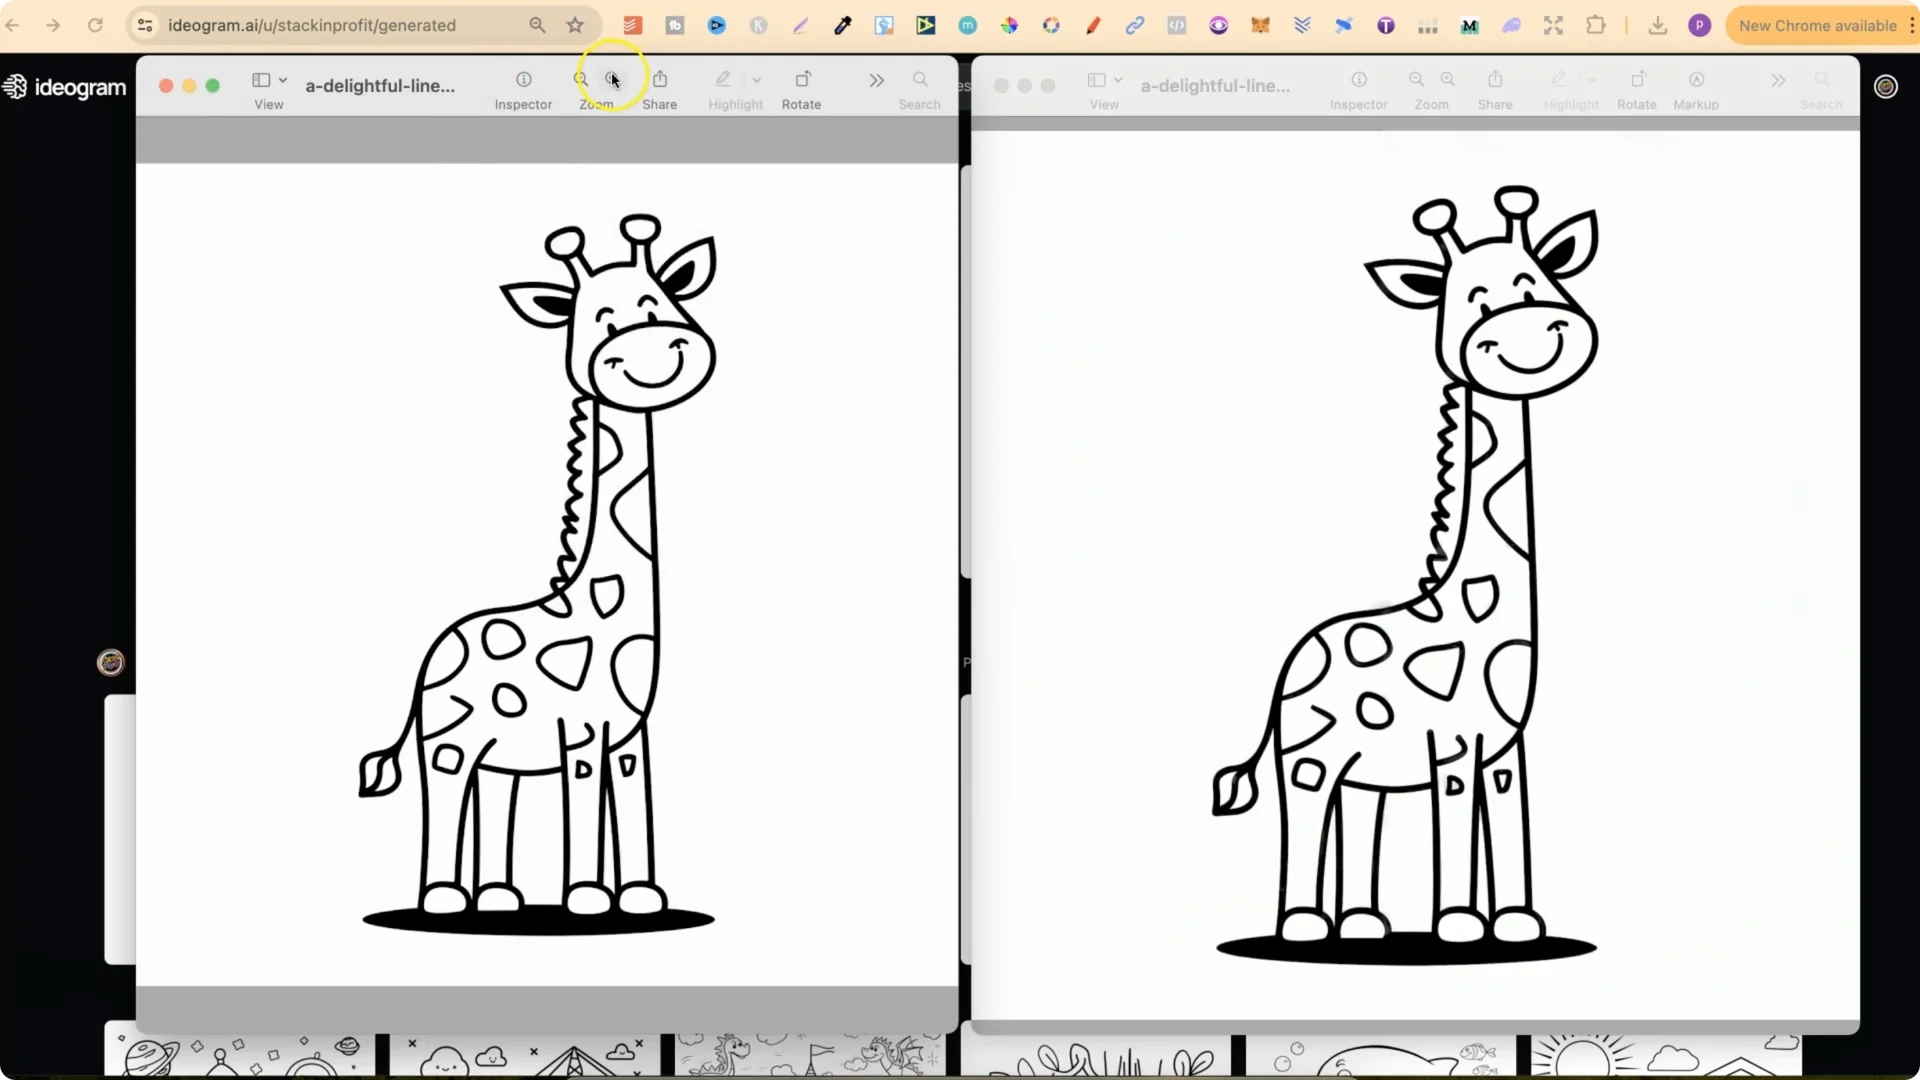
Ideogram AI Image Upscaling: Verify the 2x Result and Quality

When you zoom in on the original, it looks quite blurry. The upscaled image is not as blurry. It’s still not the best because it’s only a 2x upscale. I prefer to upscale images at least 4x, which isn’t available yet, but I’m hoping it gets added. Even though this is only a 2x upscale, it will increase the quality of your designs. Zoomed out, you won’t notice a huge difference, but it does help.
Final Thoughts
Ideogram AI Image Upscaling is straightforward: pick your image, set Resemblance and Detail, and run a 2x upscale. For line art, keep Detail low. For graphics, keep it around the middle. The quality bump is noticeable when you inspect up close, and I’m looking forward to more upscale options in the future.